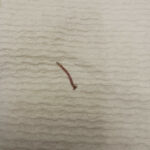
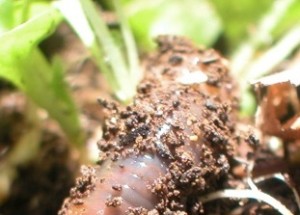
African nightcrawlers are considered perfect worms for composting. They measure roughly four to eight inches long and brownish, grayish or reddish in color. Like other earthworms, African nightcrawlers play a significant role in fertilizing the soil. They aerate the soil by creating tunnels and channels for oxygen and water to flow through. When the African nightcrawler eats organic matter such as leaves and grass, the worms’ excrememt, called “castings,” becomes a powerful fertilizer that can be used by gardeners and farmers to help manage crops. These castings are partly responsible for many of the earths green forests and lush landscapes.
If you want to do your own composting, you may purchase African nightcrawlers from a bait shop, a pet store, or you may purchase them online. Keep in mind that African nightcrawlers go by several different names including California super reds, super reds, and Japanese tigers.
About Composting with African nightcralers
Worm composting is the process of using worms to recycle organic material and food scraps into a useful soil amendment called “vermicompost.” Vermicompost is also called “worm compost.” When worms consume food scraps, the scraps become compost as they pass though the worms body. The compost exits the worm’s body through its tail. The result is a perfectly powerful fertilizer that can be used to help grow plants to their maximum potential. The reason that the worm compost is such a powerful fertilizer is that worms eat nutrient packed fruit and vegetable scraps and in turn, their bodies turn the scraps into nutrient-rich compost.
To create the perfect worm compost you will need several items including:
·Raw fruits and vegetables
·A shallow container (24″ X 18″ X 8″ should suffice) with a lid
·Moist Leaves
·Worms
Wash out the container or bin that you are using. If you have a wooden bin, line the bottom of it with sturdy plastic such as a heavy trash bag or shower curtain. Mix the organic materials together and add the worms. It takes roughly 3-5 months for the worms to eat through the materials. At this time, you will notice very little materials and a hefty amount of compost. Once this happens, it’s time to harvest.
Harvesting means: do not add any food to the bin for two weeks. When two weeks has passed, simply move all of the worm bin contents to one side of the bin and remove any large pieces of undecomposed materials. Add fresh materials – leaves, fruits and vegetables, to the empty side of the bin. Over the next two weeks or so, the worms will begin to move to the side where the new materials are located, leaving their compost behind. All that is needed at this point is to remove the old compost and replace it with fresh materials. Cover the new side of the composting bin to encourage the worms to migrate to the new side.
When you are ready to use your fresh worm compost, you can use several methods of extraction, but one method in particular seems to be the most effective. Dump the entire contents of the bin onto a large sheet of plastic and make several piles. Once exposed to the light, the worms will quickly bury themselves in the bottom of the compost within 2-3 minutes. After a few minutes, remove the top layer of compost, leaving the worms on the bottom. Once you have removed all of the worm compost, simply collect the worms and return them to the composting bin.
Worm composting material is ready to use immediately or if you choose, you can store it for later use. Worm compost can be added directly into your potting soil or mixed in with your garden soil as a soil amendment. If you notice a worm or two in the compost, don’t be alarmed. This is fairly common. Worm compost use is not limited to outdoor gardening. You can also use worm compost in the tops of your indoor plants, as the odor is not offensive.
All About Worms is always free, always reader-supported. Your tips via CashApp, Venmo, or Paypal are appreciated! Receipts will come from ISIPP Publishing.
CashApp us

Venmo us

Paypal us

You might also find these guys interesting!
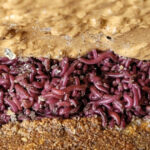
 Pile of Hundreds of Worms in Crevice are Red Worms
- The Various Species of Earthworms and Their Differences – Part 1
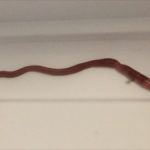
- Live Roundworm Worm Found Living in Australian Woman’s Brain
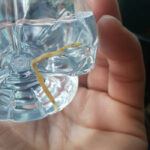
- Yellow, “Boxy” Snake-like Creature is a Flatworm
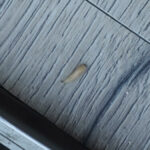
- White Worm-looking Creatures in New Home are Blow Fly Larvae
- Yellow Worms on Daffodils Could be Narcissus Bulb Fly Larvae
- Worm with Antennae is a Millipede
- Tiny, C-Shaped, White Worms Invade Every Corner of This Man’s Life


Plans are to raise african nightcrawlers for their castings. The crawlers will also be used to create compost. Whenever the nightcrawlers grow to 6″ to 8″inches in length I will sell them to our local bait shops. I have spoke with a company in Wisconsin that raises a cultured nightcrawler that can withstand extreme temperatures and does not need refrigerating. Is the african nightcrawler the cultured nightcrawler that they are talking about? No one knows. What is the proper bedding needed to grow the African?
mark